Snap fit joints 3D printing offers a clever way to assemble parts without screws or glue, making it a go-to for rapid prototyping and custom designs. These flexible connectors simplify assembly, cut costs, and keep your projects sleek and fastener-free. Whether you’re designing enclosures or consumer products, mastering 3D print snap fit joints can elevate your work. This guide explores the types, design strategies, materials, and technologies behind 3D print snap fit design, giving you practical tips to create reliable snap joints.
What Are Snap Fit Joints?
A snap joint 3D print is a flexible mechanism, like a hook or bead, that bends to lock parts together without additional fasteners. 3D printting and injection molding can custom made these joints. 3D printing (FDM, SLA, SLS) for quick prototypes and unique shapes. Injection molding for high-volume production with tight tolerances.
3D print snap fit joints shine by reducing part count, speeding up assembly, and enabling easy disassembly for tweaks or repairs. They’re used in everything from battery covers to pen caps, offering a clean look with no visible screws. However, designing a 3D print snap joint requires precision to balance flexibility, strength, and durability, as poor design can lead to weak or brittle connections.
Types of Snap Fit Joints for 3D Printing
Choosing the right snap fit joints 3D printing type is key to a successful project. Here’s a rundown of the main types, their uses, and tips for 3D print snap fit joints.
Cantilever Snap Fit
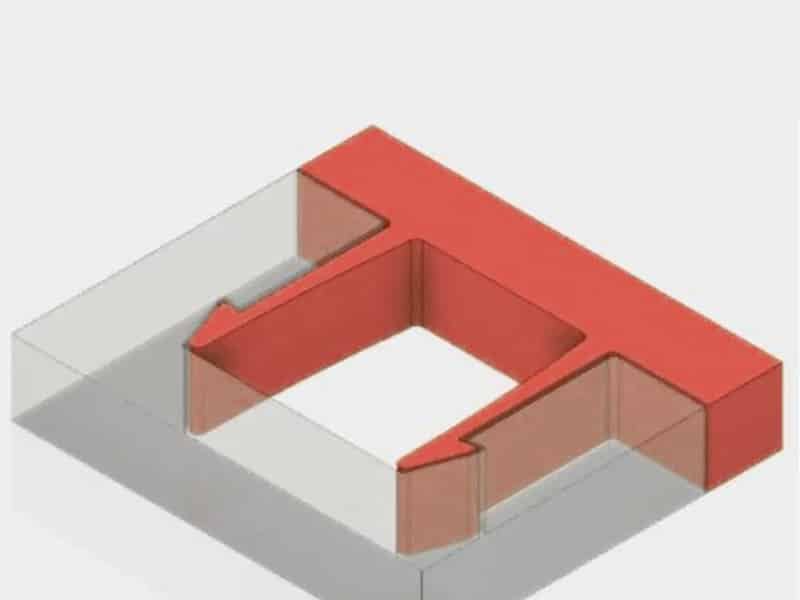
Cantilever 3D print snap fit joints use a flexible beam with a hook that bends and locks into a slot. They’re the most popular type because they’re versatile and easy to design for repeated use. You’ll see them in battery covers for secure, reusable fastening.
Cantilever Snap Fit Joints 3D printing, print beams in the XY plane to avoid weak Z-axis layers, use flexible materials like TPU or Nylon to prevent breaking, and add 0.5-1 mm fillets at the base to reduce stress.

Annular Snap Fit
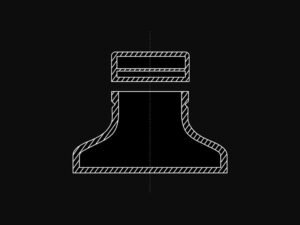
An annular snap fit 3D print is a circular joint that grips parts tightly using hoop strain, often for permanent or semi-permanent connections. Think pen lids for a tight, reliable seal.
Annular Snap Fit Joints 3D printing: use a high-precision printer like SLA (±0.05 mm) for exact tolerances, pick elastic materials like TPU or tough resins to handle strain, and test prototypes to ensure the 3D print snap joint isn’t too tight or loose.
Torsional Snap Fit
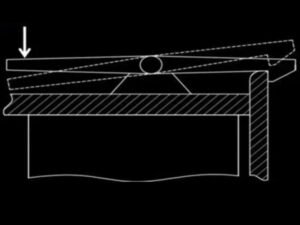
Torsional snap joint 3D print designs use a twisting motion to lock or release parts via a torsion bar. They’re great for modular shelving clips that need easy assembly.
Torsional Snap Fit Joint 3D Print: choose durable materials like Nylon to withstand repeated twisting, print torsion bars in a strong orientation (avoid Z-axis), and test prototypes to confirm the bar won’t snap after multiple uses.
Temporary vs. Permanent Snap Fits
Temporary 3D print snap fit joints (like shallow cantilever hooks) allow easy disassembly, ideal for reusable enclosures. Permanent snaps (like deep annular snap fit 3D print) lock parts once, perfect for sealed containers like food packaging. Use 0.2-0.5 mm clearance and flexible materials for temporary snaps, but tighter 0.1-0.3 mm clearance and sturdy PA 12 Nylon for permanent ones. Print prototypes to check ease of use or locking strength.
How to 3D Print Snap-Fit Joints?
Creating effective snap-fit joints with 3D printing involves selecting the right printing process and materials to ensure functionality, durability, and ease of assembly. In the next section, we explore the key considerations for choosing a 3D printing process and selecting suitable materials for snap-fit joints.
Choosing a 3D Printing Process for Snap-Fit Joints
The three primary 3D printing technologies—Fused Deposition Modeling (FDM), Stereolithography (SLA), and Selective Laser Sintering (SLS)—can all produce snap-fit joints, but each has unique strengths and limitations that impact their suitability.
- Fused Deposition Modeling (FDM): FDM 3D printing service is cost-effective and widely accessible, using thermoplastics like PLA and ABS. However, it has moderate accuracy and prominent layer lines, which can affect the fit of snap-fit joints. For best results, orient parts in the XY plane to maximize strength, as Z-axis prints are weaker due to layer adhesion. FDM is suitable for prototyping but may require post-processing to smooth surfaces and ensure a secure fit.
- Stereolithography (SLA): SLA excels in producing high-resolution parts with smooth surfaces and tight tolerances, making it ideal for snap-fit joints requiring precise fits. Its isotropic parts can be printed in any orientation without strength loss, and a variety of resins (e.g., tough, flexible, or rigid) allow customization for detachable or permanent joints. SLA is perfect for rapid iteration and functional prototyping, though some resins may degrade under prolonged UV exposure.
- Selective Laser Sintering (SLS): SLS prototyping produces durable, end-use parts with industry-standard thermoplastics like nylon and TPU. Its slightly grainy surface can enhance snap-fit security by increasing friction, and the lack of support structures simplifies printing complex designs. SLS parts are nearly isotropic, with minor strength variations between axes, making them reliable for rugged, long-lasting snap-fit assemblies. However, SLS equipment is more expensive, and the surface texture may require consideration for tight tolerances.
Materials for 3D Printing Snap-Fit Joints
Material selection is critical for snap-fit joints, as it determines the joint’s flexibility, strength, and durability. The choice depends on the printing process, the joint’s dimensions, and the required strain performance.
- FDM Materials
Common FDM materials include PLA, ABS, and their blends. ABS is tougher and more durable than PLA, making it better for functional joints, but both may require dimensional adjustments to account for lower strain tolerance. - SLA Materials
SLA resins range from standard (for prototyping) to tough and durable options (for functional parts). Tough resins mimic ABS-like properties, while durable resins offer flexibility for high-cycle snap-fits. - SLS Materials
SLS uses engineering thermoplastics like Nylon 12, Nylon 11, TPU, and composites (e.g., glass- or carbon-filled nylon). Nylon offers excellent durability and flexibility, ideal for rugged snap-fits, while TPU provides elasticity for highly flexible joints.
The following table compares FDM, SLA, and SLS for 3D printing snap-fit joints to help you choose the most suitable 3D printing process.
| Aspect | Fused Deposition Modeling (FDM) | Stereolithography (SLA) | Selective Laser Sintering (SLS) |
|---|---|---|---|
| Resolution | Moderate (★★☆☆☆) - Visible layer lines can affect precision. | Excellent (★★★★★) - High detail for precise snap-fit components. | Very Good (★★★★☆) - Fine details with slight graininess. |
| Accuracy | Good (★★★★☆) - Slightly lower tolerances may impact tight fits. | Excellent (★★★★★) - Tight tolerances for accurate snap-fit joints. | Excellent (★★★★★) - High accuracy for reliable fits. |
| Surface Finish | Poor (★★☆☆☆) - Prominent layer lines may interfere with fit. | Excellent (★★★★★) - Smooth surfaces ideal for precise snap-fits. | Very Good (★★★★☆) - Slightly grainy finish can enhance friction for secure joints. |
| Production | Moderate (★★★☆☆) - Suitable for small batches. | Good (★★★★☆) - Fast printing for rapid prototyping. | Excellent (★★★★★) - High throughput for complex designs. |
| Complex Designs | Moderate (★★★☆☆) - Limited by support structures and orientation. | Good (★★★★☆) - Handles intricate designs with supports. | Excellent (★★★★★) - No supports needed, ideal for complex geometries. |
| Ease of Use | Excellent (★★★★★) - Simple setup and operation. | Excellent (★★★★★) - Plug-and-play with minimal training. | Good (★★★★☆) - Requires moderate training for powder management. |
| Pros | Low-cost machines and materials; fast for simple parts. | High accuracy; smooth finish; fast printing; wide material range. | Strong, durable parts; design freedom; no supports; industry-standard materials. |
| Cons | Lower accuracy; limited design freedom; visible layer lines. | Some resins sensitive to UV light; post-processing required. | Rougher surface; limited material options; higher equipment cost. |
| Applications | Concept modeling, rapid prototyping, functional prototyping, manufacturing aids. | Prototyping, rapid tooling, medical/dental models, jewelry casting, functional parts. | Functional prototyping, low-volume production, durable manufacturing aids, medical devices. |
| Print Volume | Up to 300 x 300 x 600 mm (desktop/benchtop). | Up to 353 x 196 x 350 mm (desktop/benchtop). | Up to 165 x 165 x 300 mm (benchtop industrial). |
| Materials | Thermoplastics (PLA, ABS, blends). | Resins (standard, tough, flexible, biocompatible, castable). | Thermoplastics (Nylon 12/11, TPU, glass/carbon-filled composites). |
| Equipment Costs | $200–$15,000 (budget to industrial). | $200–$25,000 (low-cost to large-format). | $30,000–$200,000 (benchtop to industrial). |
| Material Costs | $50–$200/kg (filaments). | $100–$500/L (resins). | $100/kg (nylon, reusable powder lowers costs). |
| Labor Needs | Manual support removal; lengthy post-processing for high-quality finish. | Washing and post-curing; simple support removal. | Semi-automated powder cleaning; simple post-processing. |
| Facility Requirements | Air-conditioned or ventilated space. | Office-friendly desktop/benchtop systems. | Workshop with space for powder management. |
| Snap-Fit Suitability | Fair – Best in XY plane; post-processing often needed for fit. | Good – Tight tolerances, smooth finish, flexible material options. | Excellent – Durable, friction-enhanced joints, no supports needed. |
Best Practices for Designing 3D Print Snap Fits
Designing snap fits for 3D printing requires careful consideration to ensure strength, functionality, and printability. Below are some the practices for designing 3D printing snap fits.
Taper the Cantilever Arm
Gradually reduce the thickness of the cantilever arm from 100% at the base to about 50% at the tip. This minimizes stress concentration, improves flexibility, and saves material while maintaining strength.
Reduce Stress Raisers
Add fillets or smooth curves at the base and edges of the snap fit, avoiding sharp corners. This reduces stress points and enhances durability. Sharp edges can also cause printing inaccuracies, especially in FDM printing.
Balance Rigidity and Flexibility
Design one mating part to be rigid and the other flexible. This simplifies calculations for mating force and makes troubleshooting easier during iterations, ensuring a reliable snap fit.
Incorporate Alignment Features
Add lugs or guides to align mating parts accurately. These features strengthen the connection, reduce shear stress on the snap fit, and make assembly more intuitive.
Scale Thoughtfully
Avoid simply scaling snap fit designs up or down, as mating forces don’t scale linearly. Adjust dimensions carefully to maintain proper functionality, especially for annular snap fits.
Fine-Tune Mating Force with Width
Adjust the cantilever’s width rather than thickness to control mating force. Width changes offer finer control, as deflection scales linearly with width but quadratically with thickness.
Optimize Print Orientation
Orient the snap fit parallel to the build plate to maximize strength, as 3D-printed parts are weaker in the vertical (z-axis) direction. Avoid placing supports in or near the snap fit to simplify post-processing.
Maintain Consistent Wall Thickness
Keep wall thickness uniform to prevent warping or uneven cooling in processes like FDM or SLS. When filleting, ensure the outer radius equals the inner radius plus the wall thickness.
Add Fillets at the Cantilever Base
Include a fillet with a radius at least 0.5 times the cantilever’s base thickness. This distributes stress evenly, strengthening the snap fit.
Design for Assembly Deflection
Ensure the snap fit only deflects during assembly, not when connected, to reduce long-term stress and improve the joint’s lifespan.
Iterate for Optimal Stiffness
Test and adjust the snap fit’s width and stiffness through iterations. Aim for a minimum clip width of 5mm to ensure sufficient strength while meeting design constraints.
3D Printing Snap Fit: Simplified Steps
- Learn Snap Fit Basics: Understand snap fit types (e.g., cantilever, annular) for secure, fastener-free connections.
- Design in CAD: Model the snap fit with proper dimensions, tolerances (0.2–0.5mm), and draft angles using CAD software.
- Prototype and Test: Print a small test piece to check fit, strength, and snapping ease.
- Refine the Design: Adjust hook size, angle, or thickness based on test results for optimal performance.
- Set Printing Parameters: Use flexible materials (e.g., PLA, PETG), fine layer height (0.1–0.2mm), and 20–30% infill. Orient parts to avoid weak points.
- Print and Post-Process: Print the parts, remove supports, and sand surfaces for a smooth fit.
- Assemble and Iterate: Snap parts together, test functionality, and refine the design if needed.
Conclusion
3D print snap fit joints offer a cost-effective, fastener-free solution for prototyping and production. Select the right type, like cantilever or annular snap fit 3D print, and use smart design, durable materials, and optimal printing technology to create reliable snap joint 3D print connections. Start designing your own snap fit joints 3D printing project today! For professional 3D printing snap fit joints services, contact Zhongde for expert solutions.
FAQs with 3D Print Snap Fit
Yes. Especially with FDM, thin snap-fit areas are more likely to crack due to weak layer bonding. We recommend optimizing the design or using stronger methods like SLS.
Yes. Layer bonding is weaker along the Z-axis. We adjust the orientation based on your usage to improve strength and durability.
